
Hello!🌲☃
***update April 15, 2016. So I have been doing M1 increases wrong and changed this post to reflect the proper way to do one. I'll add some more correct pics once I take them!
I am currently on my vacation from work and relaxing out in the country! I live in the city and every once in a while it is nice to escape that life and get out in the fresh country air. It is just so nice and I get to visit some cuddly farm cats as well. So nice seeing as I can't have animals where I live.
Last week I started making slippers! They are using my Bernat Mosaic yarn and just turned out beautifully! I am very happy! 😄 I actually had no mistakes (hard to believe!) and they didn't take too long to knit up. Sorry, I actually did make a mistake. I forgot! Oops. I cut my long yarn tail before binding off. Blonde moment! 🙎🏼 I thankfully had enough yarn to bind off and join my slipper together. Thank god I gave myself lots of extra yarn!
So this post will be about how to do a M1 (make one - increase). This is a way to do an increase in your knitting. Other methods are KFB, or YO. There are also different M1 (left or right). I believe I do the right M1 version, but I'm not sure. It shouldn't matter as long as you do it the same every time! At least, that's my motto! And if it doesn't work out, unravel your project and start again, but do it the other way!😉
So here are my pictures of how to do the M1 increase!
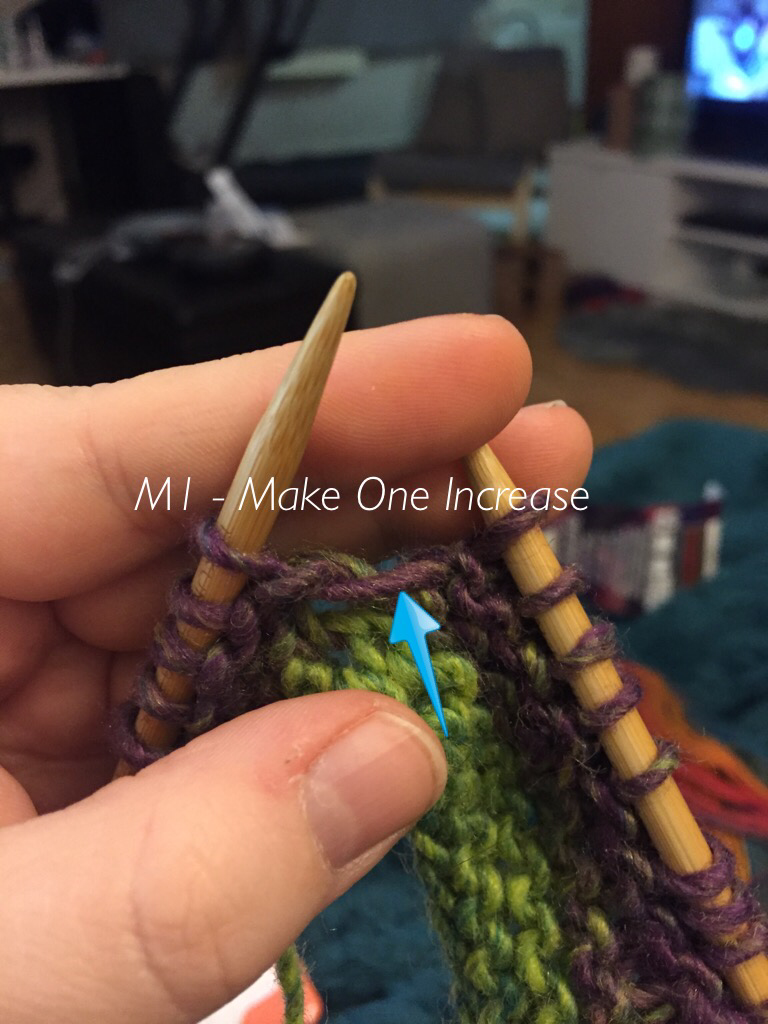
The stitch the blue arrow is pointing to is the 'bar' that you need to pick up to do your M1 increase.
Put your right needle under the front of the bar and then slip it into your left needle so that the left side of the bar is coming from the back over the needle.
Now just knit the stitch through the BACK-LOOP just as normal. This will keep a hole from forming. If you knit through the front you'll basically get a yarn over. That's it. A Make 1 increase. Very easy!
I hope you are enjoying my posts and that you will comment on how I am doing as far as tutorials and writing! If you would like me to try anything, I am always up to trying a new pattern!
My slipper pattern and end result will be on next weeks posts!
Keep warm!
Aynsley
I hope you are enjoying my posts and that you will comment on how I am doing as far as tutorials and writing! If you would like me to try anything, I am always up to trying a new pattern!
My slipper pattern and end result will be on next weeks posts!
Keep warm!
Aynsley

 RSS Feed
